1 Day Daemons - How to Paint Plaguebearers
If you have any questions / comments, please feel free to post on the forum thread for this tutorial.
Hello again all, I thought I'd get this one out before I completely forget exactly how I went about doing these guys, it's very similar to the method I used to paint my nurglings (almost exactly the same actually), but I've had a few people asking how I went about it, and as I have the photos it'd be rude not to oblige!
What is more I got some fairly decent shots that nicely demonstrate a couple of little tricks upon which I rely extremely heavily to paint models fast and remove faff - in this case uber preshading and highlighting with sprays, and sealing sand to bases - with spray varnish.
Before I get to the tutorial I'd like to ramble about my love for this kit a little, if you're not interested scroll down until you see a koala made of symbols.
This has to be one of my favourite boxes of troops in the past 2 years or so, it is absolutely outstanding - I love the models, in particular I love painting them. It sounds like an obvious thing to say but you could paint these models in any scheme you imagined; they are essentially flesh, innards, and weapons. This simplicity is what I like. What's more, the detail on every part is perfect for drybrushing and washing, I think sickly pale with yellow bruises would be a really nice option, or a desert-yellow base with really deep black bruising, you could pick any main colour and then paint the weapons and bases to compliment.
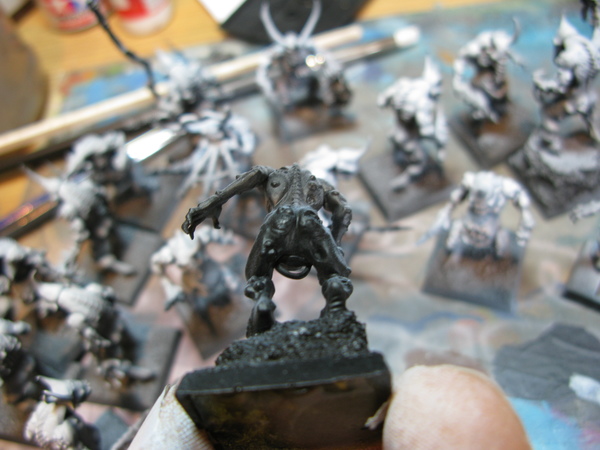
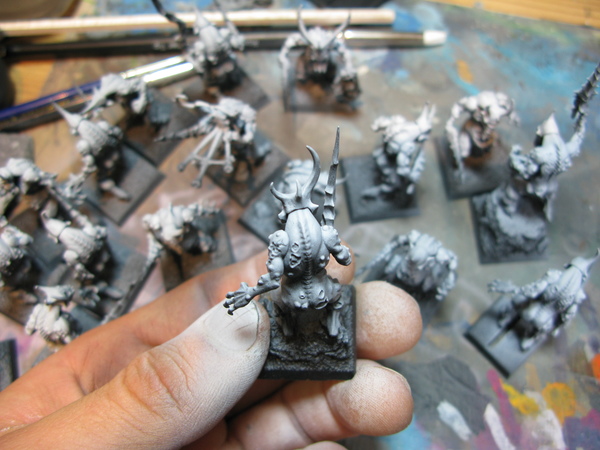
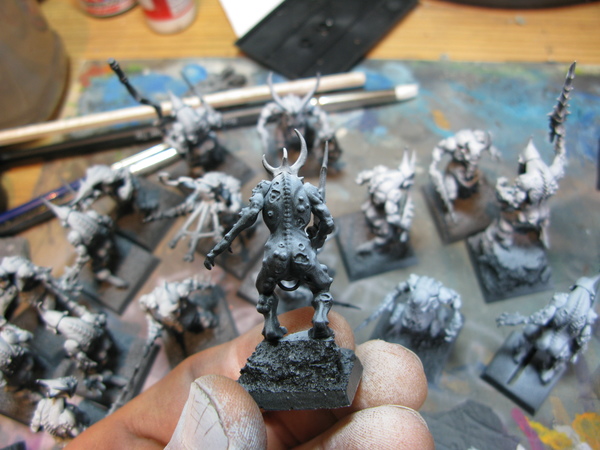
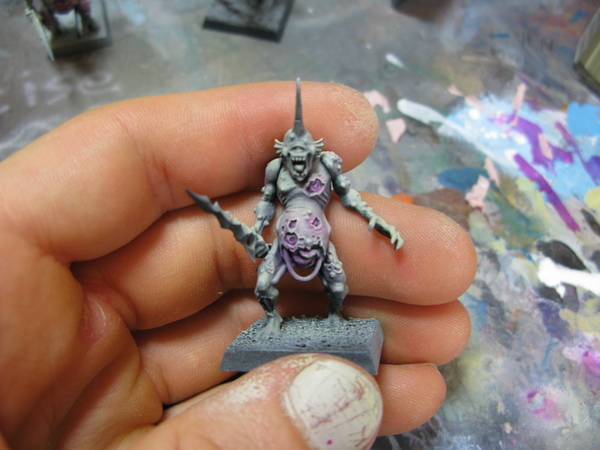
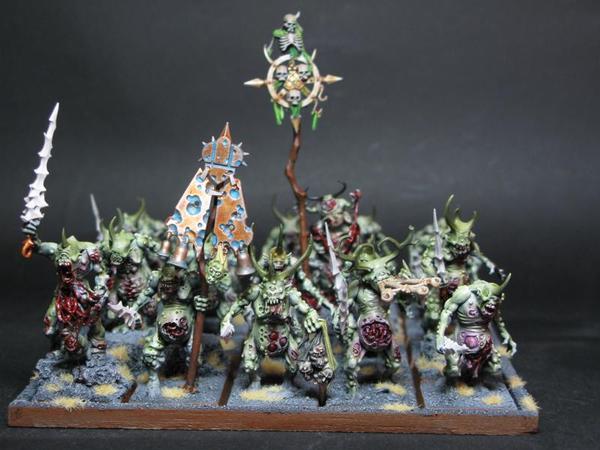
Also the heads and character in general is just fantastic, and there's so much potential for kitbashing and converting! I did a couple of minor conversions; combining it with the nurgling kit - to make a herald, and a unit filler with some happy little nurglings.
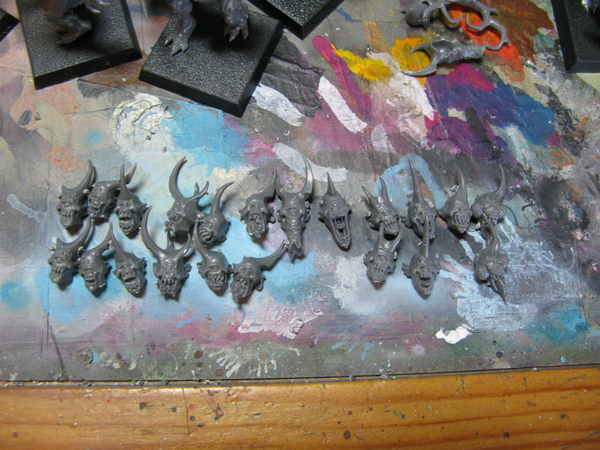
Possibly the best selection of heads I've vr seen on a core regiment box I think.
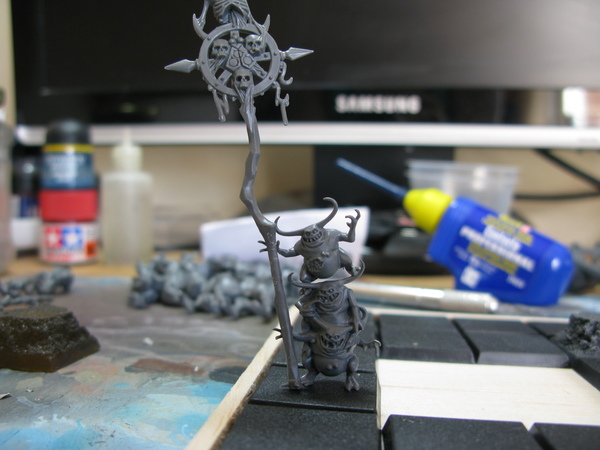
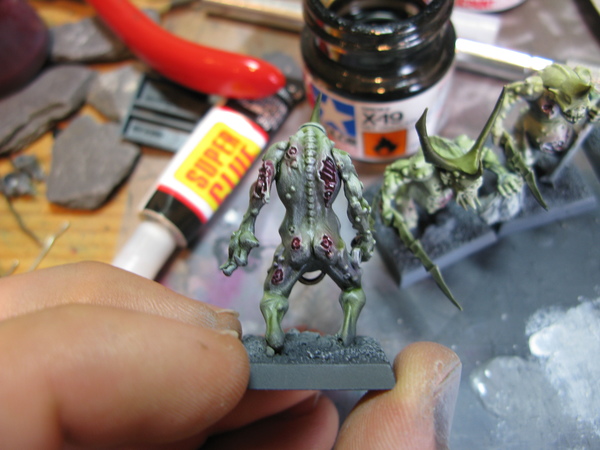
My herald conversion

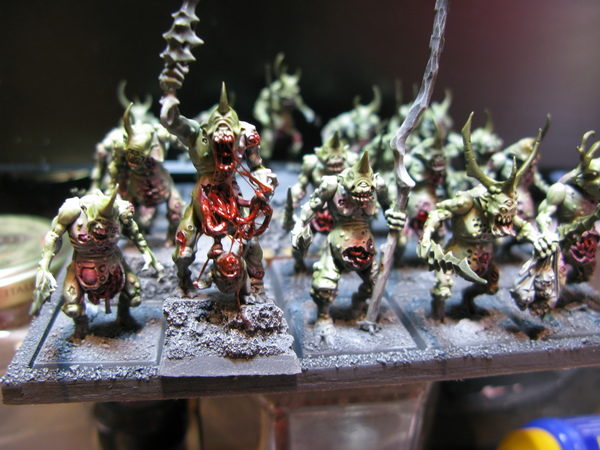
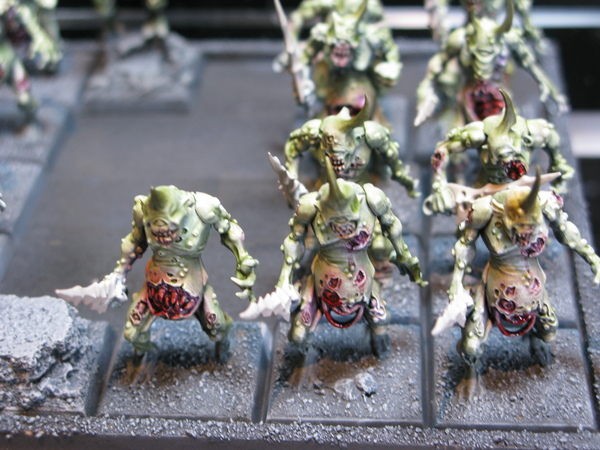
The unit as a whole,I stuck the guys who were going to be on resin bases to plastic bases for ease of painting, using less glue than I normally would so they can be ripped off easily later.
@(*0*)@
Here we go:
Equipment:
Tools:
One or more sexy Plaguebearer kits
Your favourite size of regiment painting brush
Wash brush
Drybrushing brush (makeup brush)
Paints:
A Black and White spray, ideally primers (the black most importantly, as it goes on first), I used:
The Army Painter 'Base Primer - Matt Black'***
The Army Painter 'Base Primer - Anti-Shine, Matt Varnish'
Skull White Primer Spray***
Liche Purple
Xereus Purple
Rotting Flesh
Nurgling Green
Matt White
Matt Black
Codex Grey:
Vallejo Cold Grey
Dheneb Stone
Rakarth Flesh
Snakebite Leather
Balor Brown
Vallejo Glaze Medium
Gore:
UHU Glue (see sticky gore tutorial)
Tamiya Clear Red
Tamiya Smoke
Basing:
Dead grass
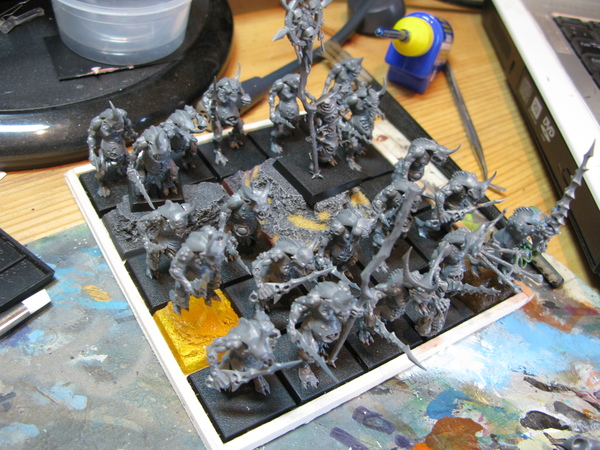
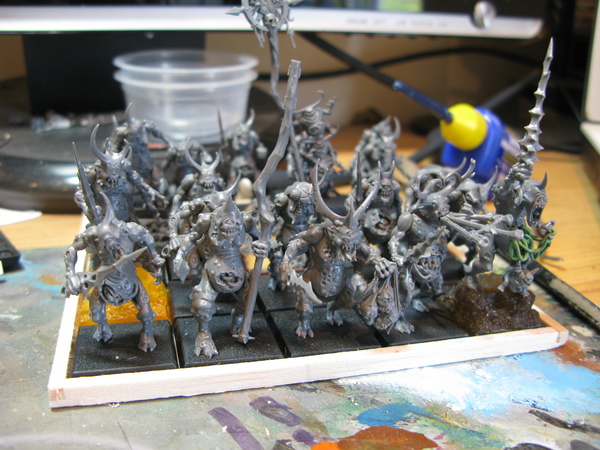
Step 1.) Assemble your models!
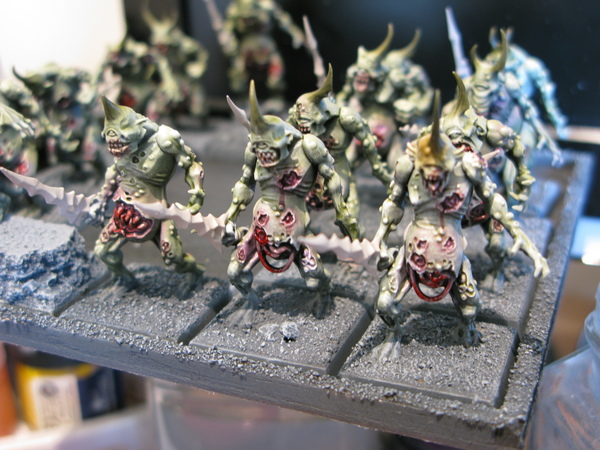
They rank up really nicely, but a couple of arms have longer swords than others, pointing these in the air is probably a good idea, I thought of this too late, so used a couple of home-made resin bases to make ranking up easier. This also added some varying heights to the unit, which is always a good thing.
 Step 2.)
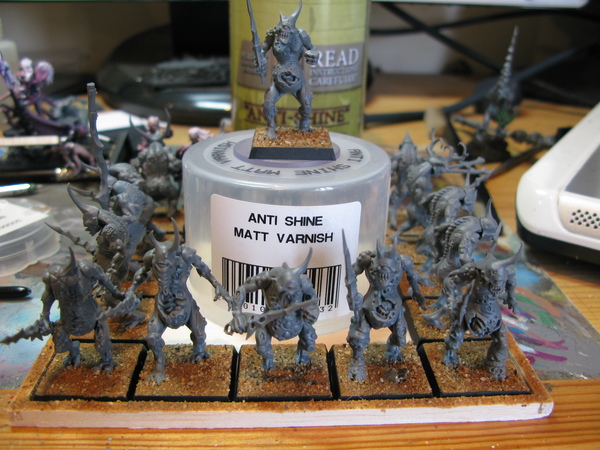
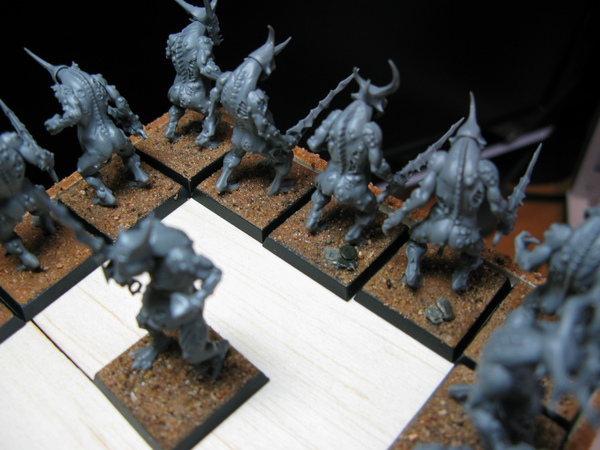
 Sand + Seal bases.
I always seal my sand, you're not after perfect coverage as you are with a colour primer, so ranking them up like this is my preferred method, the third (blurry, sorry) picture is with black spray to show more accurately where the varnish is.
 Step 3.)
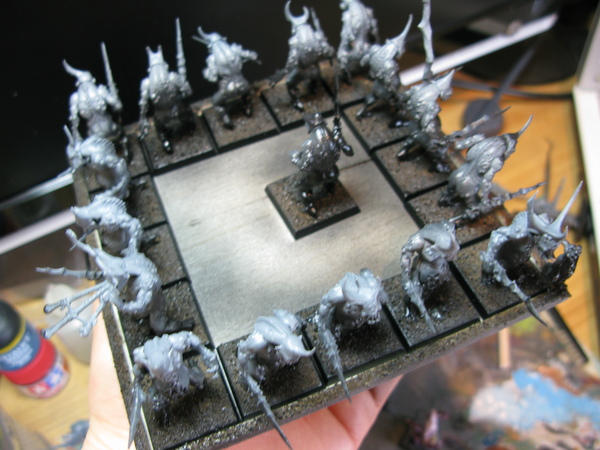
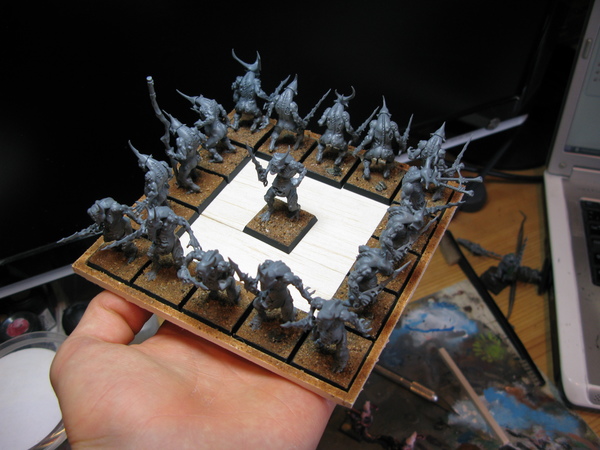
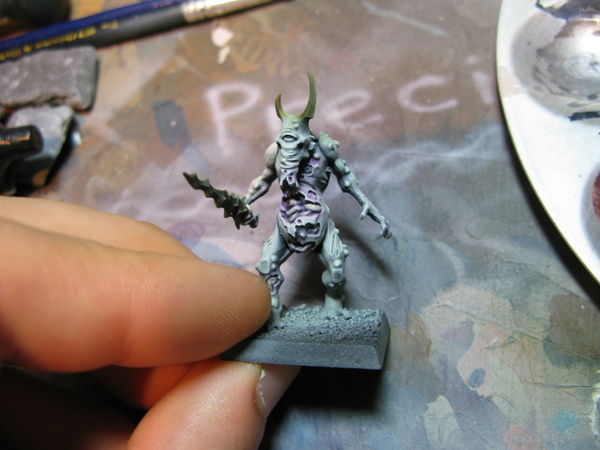
 Preshading+prehighlight.
Prime black, do this carefully and make sure to get in all the nooks and crannies. Then spray white lightly from 45 degrees, and then from above, your mini should be white from the top and black from the bottom. From horizontal you should be able to see the gradation between black and white, showing as grey in the mid-tones. As I wanted these models fairly bright pre wash stages I used a little more white than I usually do. I took a few pictures here to try and show this accurately.
From Below, what a view...
And above:
And the overall effect:
 Step 4.)
 Basecoat.
I used rotting flesh, this is quite a weak colour anyway, but the steps in the preshading are made to work with semi-transparent layers at this stage, so as ever I mixed vallejo glaze medium in, and tried to get a thin coat all over the models. Do not worry about getting it on the base etc.
 Step 5.)
 Bruises/innards.
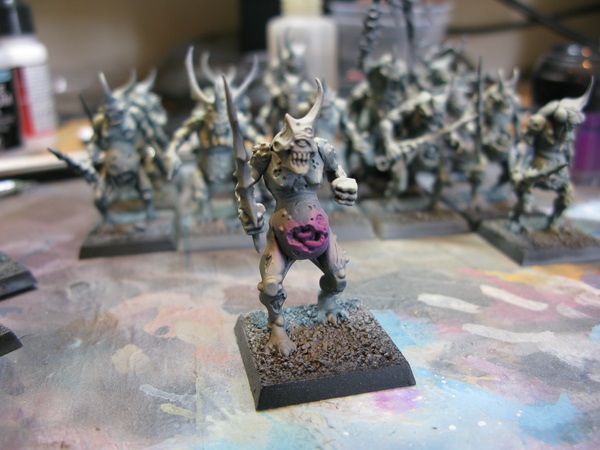
I used warlock purple here, but was torn between going darker (warlock purple) or going in a different more disgusting direction with yellow pus-y instead of purple bruised, for which I would have used Snakebite leather + Sunburst yellow. Try to stick to the bruises/sores, but a little bit over the edges doesn't matter at all, as the subsequent drybrushing will help cover mistakes, as will the washes.
 Step 6.)
 Drybrush #1.
Rotting flesh + matt white, with the slightly stiffer of my makeup brushes, all over, keep it light and be patient, there shouldn't be much on your brush at all, it will pick out the details or sores, and the innards - the white on the innards isn't an issue, it'll work as a natural highlight.
(before drybrush)
 Step 7.)
 Drybrush #2.
Matt white, using my softer brush, all over, super light, again take your time and do it right.
 Step 8.)
 Horns.
I mixed snakebite leather with a touch of caliban green and matt black for these, and attempted to make the fade into the scalp area fairly subtle, again mistakes aren't too much of an issue, as the wash will pool around hte base, helping the gradation between colours.
 Step 9.)
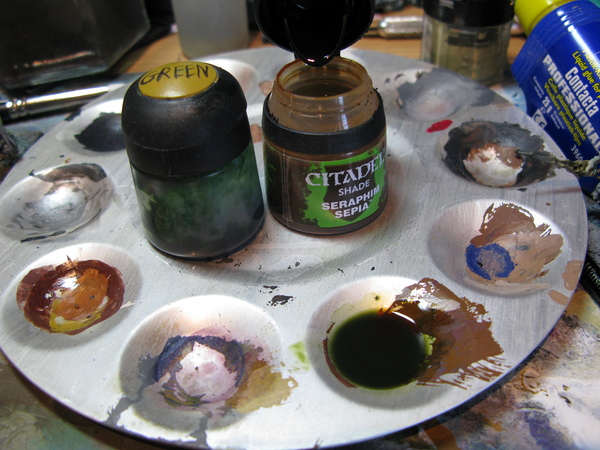
 WASH!
I love this step, take a nice fairly large brush (bigger is better for washes IMO), and get the models all over, I used Thraka Green, Seraphim Sepia, and a dot of glaze medium to make it go smoothly. Try and soak up and excessive pooling with your brush, and work over the model in sections ending each application in joins, or go tom to bottom or bottom to top to avoid missing areas. For these I tried to go bottom to top in sections - legs, torso, arms, head.

 Step 10.)
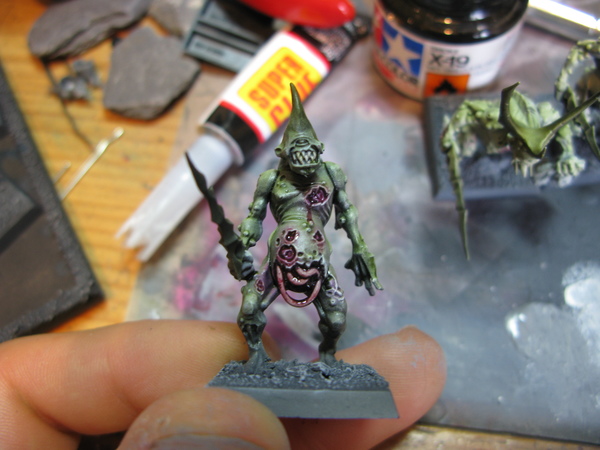
 Gore base-coat.
I used the 'blood mix' outlined in my gore tutorial from a while back for this, it's a mix of water effects, red and brown washes - basically try and get the colour of blood, and put something transparent in there, I like a touch of purple as well. I applied it all over anything gooey, letting the contours of the model contain pooling etc. The nature of this means that if the mix clots and looks a bit lumpy it isn't an issue either.
 Step 11.)
 Gorey bloody bits.
I used a touch of tamiya smoke mixed with tamiya clear red and daubed it randomly on the innards, sores, etc, this stuff is super bright, and transparent.
 Step 12.)
 Weapon basecoat.
Dheneb stone, all over (it was a toss-up between this and gloss black, which I would have done black base-coat, a light drybrush of dark grey, and then a gloss varnish).
 Step 13.)
 Weapon drybrush highlight.
Matt white + a touch of dheneb.
 Step 14.)
 Basing:
Chaos black + grey basecoat, wait for it to dry, drybrush grey, I finished off using citadel dead grass, which works really nicely on dark bases.
Done! As every any questions, queries, or thoughts let me know here, or on
The Twitters
***I'm quite particular about which brands of spray I use, I love army painter for coverage, but GW are more precise, so for this reason I tend to use AP for the base layers, and citadel for the 'highlights' as you do not need accuracy for the first, but you do a little for the second.
What our customers are saying...
Sign up for our newsletter - for the latest news and promotions